Saturday, February 28, 2009

Rubbish Art

Dear Diary,

When I stumbled upon this I realised that great ideas may jump from nowhere.

These guys (Tim Noble & Sue Webster) set up their rubbish in such way that when light aims them in a certain angle, their shadow becomes the actual artwork.

Some samples below...


{ Tim Noble and Sue Webster, Real Life is Rubbish, 2002 | two separate piles of general household rubbish onto which a light is projected, creating a shadow self-portrait of Noble and Webster }


{ Tim Noble and Sue Webster, Dirty White Trash [With Gulls], 1998 | six months’ worth of the artists’ rubbish }


Tuesday, February 24, 2009

Optimizing Photoshop CS4 on Mac

Dear Diary,
I found a very interesting article posted by Yuri Arcurs the other day and I thought that might be useful to many of us...
(Ps. You can read the original article on Yuri's site by clicking here)

How to optimize the new Photoshop CS4 and how it differs from CS3 regarding performance


With the newly launched CS4 a lot of people are experiencing new problems and error messages. This is ironic because the main focus of CS4, according to Adobe, is to optimize performance and work flow.

However, a lot of the errors and problems that can occur can be fixed by using the right setting. Many of the problems are not based on CS4 Adobe programming but rather customary user habits that worked well with CS3, but not so well with CS4.


This article is about what you can do to optimize and tweak Photoshop CS4 to get the best settings to maximize performance for the high-resolution digital photographer (full frame or under).


Photoshop CS4 is different from CS3 and I have been getting too many "Out of RAM" errors to ignore this problem. At my department we work with lots of very big files (39 MP+). This requires serious computer power and even with tons of Mac power and lots of memory (RAM), sometimes things just do not move as fast as we hope for.


I just spent a weekend with my team trying to figure out Photoshop CS4 in therms of optimizing for the best possible performance for stock photography and below are the results. When we did these changes to all our computers, the result was mind-blowing. Spread this post around, because it really, really,…will help a lot of people!


Setting scratch disks


In Photoshop > Preferences > Performance > Set your scratch disk location


The main issues we had with this setting was that sometimes a computer would have less than 2 GB of free storage space available and no one noticed. Photoshop needs at least 2 GB of free hard disk space as scratch disk so make sure you always empty your trash bin and free space regularly. More often than you think you will have too little free space for Photoshop to perform well. We try to have about 10 GB of free space on all our computers at all times.


Adjusting your Cache Levels to 8


In Photoshop > Preferences > Performance > Set Cache Level to 8


Low levels are for users with low-res images with lots for layers, high numbers for users with high-res and not too many layers (below 50). For the high resolution digital photographer, a higher setting is better. For full frame shooters or photographers shooting at 16 MP+, a setting of "8" is best. Go to Photoshop > Preferences > Performance > Enter the value 8 in the Cache Levels text box. Click OK.


Set the History States to no more then 15 states


In Photoshop > Preferences > Performance > Set History States to 15


When you reduce the number of history states available, you potentially reduce the number of copies of your image filling up your memory (RAM). If you are a high resolution photographer and not a digital artist that “paints” and uses a lot of brushes in Photoshop, there really is no reason for you to have more then 15 history states. Every state is potentially a full resolution copy of your entire image that has to be stored in the cache, so even at 15 history states, this is potentially equal to having 15 images open at once. If you like to move around layers, merge layers, copy layers, liquefy, free transform, paint on masks, copy adjustment layers from one image to another, you are in danger of filling up your cache very fast. Photoshop default is 10 history states, so if you have less then 4 GB of memory, then you should stay at this setting.


Set the Photoshop memory usage between 85-90 and not 100%


In Photoshop > Preferences > Performance > Select Photoshop Memory Usage to 85%


Counter intuitive, Photoshop needs outside memory (non-Photoshop allocated RAM) to perform some Photoshop tasks such as Free Transform, Liquefy and Content Aware Scaling. If Photoshop is set to memory usage of 100%, you risk getting the famous new CS4 error message “could not perform action… out of memory.” My workstation has 32 GB memory and I still get this message if I set the Photoshop allocation of memory to 100%. When I got CS4 I found this issue so irritating that I at one point moved back to using CS3. It took me quite a long time to figure out that what I had to do was to turn down the amount of memory allocated to Photoshop in order to free more memory. Very counter intuitive


Deselecting Export Clipboard


In Photoshop > Preferences > General > Deselect Export Clipboard


Unless you export a lot of copied files or clips from Photoshop to other applications there is no reason to have this function turned on. Every time you switch away from Photoshop, it stores the clipboard elements as a a PICT file, ready to use for other applications. When switching between applications with Exposé, this function creates the lag that sometimes is experienced in going from Photoshop to other applications.


Do not have any files on your desktop


According to some Mac experts, having files and folders on your Mac desktop is equivalent to telling the Mac OS to keep these files active in memory at all time. Most people will have stacks of things on their desktop background because of comfort, but they should, according to most experienced Mac users, greatly reduce the performance of your system overall. This is a waste of cache resources, unless you really use the files on the desktop a lot.


Don’t use 16 bit Tiffs


After almost two years of using 16 bit Tiffs at my department, we set up a test to determine if we where actually able to see a difference in quality. The result was interesting. No one at my department (almost ten people involved in photography), where able to distinguish 16 bit files from 8 bit files. If 16 bit files were directly compared to duplicate 8 bit files, most people where able to see slightly more color details in shadows, but none in the bright areas. If you are a stock photographer, remember that all your files are converted to jpeg, which is at 8 bit anyway.


Save files as Tiff uncompressed without compression


Even though I highly recommend saving Tiff files as compressed lossless, only do this as the last step. When editing pictures, whether opening or saving, never use compression. Compressing a file takes up to five to ten times longer, both opening and saving.


Turn off Application Frame


This feature is supposed to be one of the main reasons why a lot of people are getting the "Out of RAM" error. Turn it off and remember that CS4 handles multiple files differently than CS3 and therefore you cannot have as many open windows with high-resolution files as you could before. This is a little frustrating and I personally hope for an update that will fix this issue.


Almost done


Restart Photoshop for the changes to take effect and do a little system optimizing.


Go to Application > Utilities > Disk Utility > Press Verify Disk Permissions and wait.


Go to Application > Utilities > Disk Utility > Press Repair Disk Permissions and wait.


Read this adobe article for more information.

Monday, February 23, 2009

Miguel A. Salek - A man of wonders

Dear Diary,

What can I say about this man?
One of the masters of Visual FX and the absolute Guru of ink-flowing technique...

Enjoy...

Sunday, February 22, 2009

Augmented Reality - A brave new world

Dear Diary,

Today I have stumbled upon something amazing.
The concept is pretty straightforward... mix reality with virtual-reality in real time and in such way that would be fully interactive with the average-equipped computer user (ok this is my definition anyway).

You really have to see it to believe it...


Ps. Look for related posts on youtube, some of them are really awesome

Monday, February 9, 2009

Market Crisis

Dear Diary,

While walking on the streets the other day, something caught my attention...

The funny thing is that this mannequin was currently on display of a clothing store...

Tuesday, February 3, 2009

Illustrator Tutorial - Make an iPod

Making a blue ipod nano in illustration

As I promised, I have managed to write a tutorial (finally) on illustration trying to be as detailed as possible on making a photorealistic replica of an ipod.

Let's get started !

(Note: Click on the images to enlarge)

Step 1

Ok, this step is every designer's dirty little secret :P
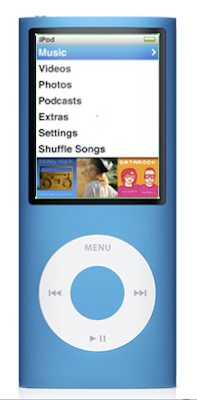
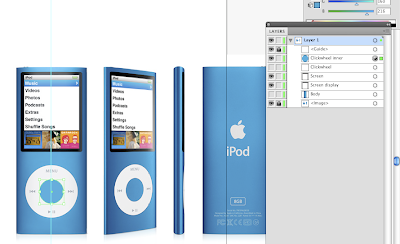
Always use a source photo when you try to replicate something that people can recognise from miles away...

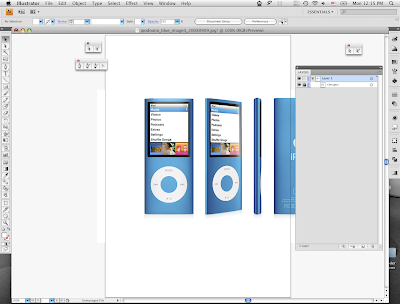
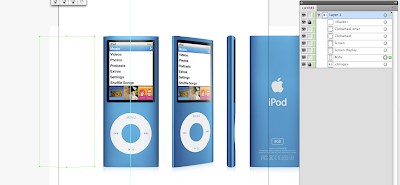
So grab a photo of the ipod (apple's site has excellent shots of the product) and drag it on to illustrator.


Step 2

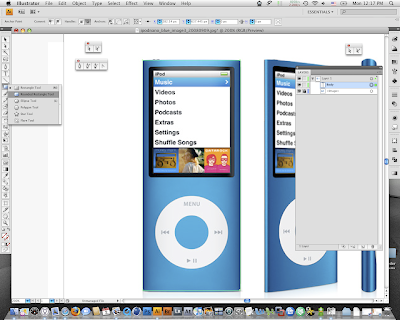
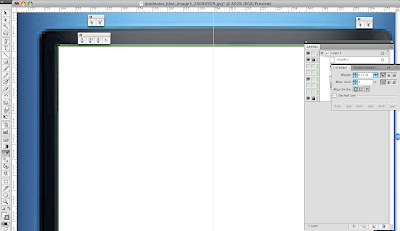
Lock the image layer preventing from accidentally moving it while working on it (just click to the box right next to the little eye on the layer's pallete)


Step 3


Select the Rectangle Tool (M) and make a shape around the body of the ipod (right now the only thing we really want is to match the four corners). Name it "Body" on the layer's palette.
Note: After you choose the right tool, make sure that both foreground/background colour is set to "none", so that you can see beneath the shape.


Step 4

Select the Rounded Rectangle Tool and make another shape to match the display of the ipod. Name it "Screen".


Step 5

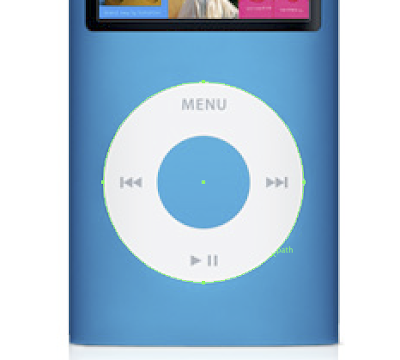
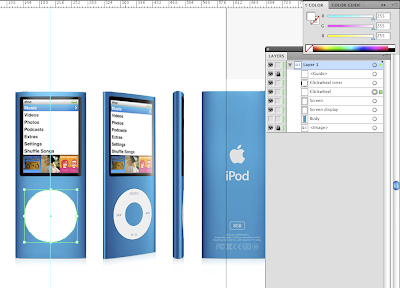
Use the Ellipse Tool (L) and make a perfect circle to match the Clickwheel (tip: hold Shift key while you make the shape to make it a perfect circle and hold Space key when you need to move it around while you design it). Name it "Clickwheel".


Step 6

Use the Ellipse tool again to create the inner blue circle on the Clickwheel. Name it "Clickwheel inner".


Step 7

The last shape that we are going to create is the display image. So use the Rectangle Tool to create it. Name it "Screen display".


Step 8

Now, we are going to edit a little bit the body matching the curved lines we seen on top/bottom.
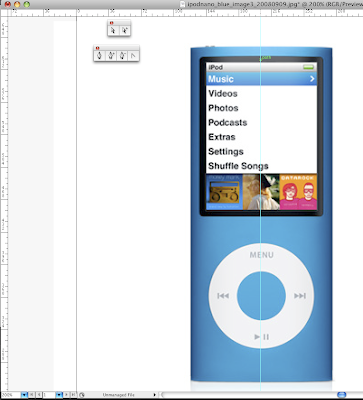
First, turn on the rulers (in case they are not already open) by hitting Command+R (Control+R on a PC). Then create a guide line to the centre of the ipod by clicking and dragging from the left ruler to the centre of the document.


Step 9

Now pick the Pen+ Tool and having selected the "Body" layer create an additional point where the guideline meets our shape (tip: you can turn on the Smart Guides feature by hitting Command+U (Control+U on PC) as a helper if you want. It will automatically snap in the cross section when your cursor is near)


Step 10

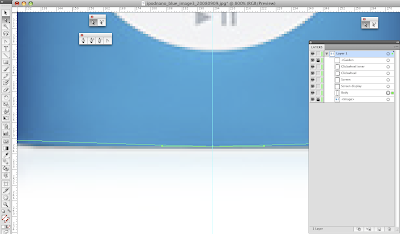
Grab Direct Selection Tool (A), click on the new point and move it a bit upwards so to match the curve on the underlying image.

Step 11


Repeat the same procedure to match the curve on the bottom side of the ipod.


Step 12

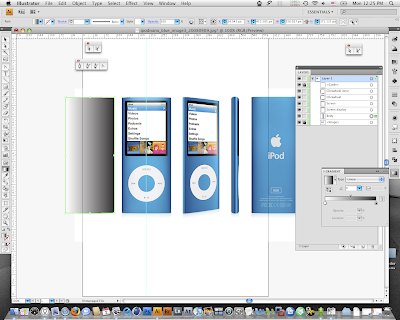
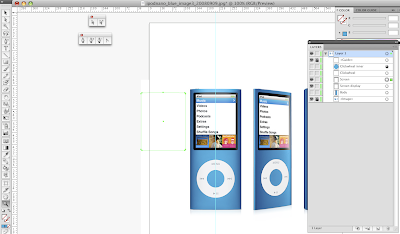
Now we are going to add some colour. Select the "Body" shape (click on to the corresponding little ball-button on the layers pallet) and by holding Shift key press left arrow key on your keyboard to move it on the left side of the image (avoid moving it by mouse so you can bring it exactly where it was after we apply the colour).


Step 13

Apply a gradient to the shape (click on the middle little square right below your Foreground/Background colours)


Step 14

We are going to use 3 gradient stops to create the right effect. So, click (and thus add) one more stop on your gradient in the middle of the gradient ramp onto your Gradient palette.
Then just click on the leftmost colour indicator (its little triangle becomes black, so you know it's selected), grab the Eyedropper Tool and by holding Shift key (it is absolutely critical to hold the shift key otherwise when you click on to a colour the shape will become flat coloured) click anywhere onto the left dark-blue shadow of the image.
Then select the middle gradient marker and again by holding shift pick a sample from the middle part of the ipod body (the light blue one).
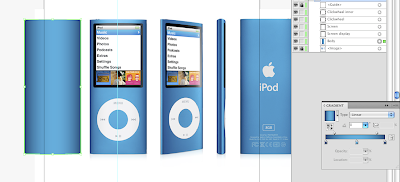
Finally select the rightmost gradient marker and choose once more the dark blue colour on the right side of the ipod image.
(Note: after choosing the right gradient colours, drag the little diamond-shaped indicators on your gradient ramp to define where the shadow is starting to blend with the main blue colour. See the detail on the image below)
When you finish you must have something like this.
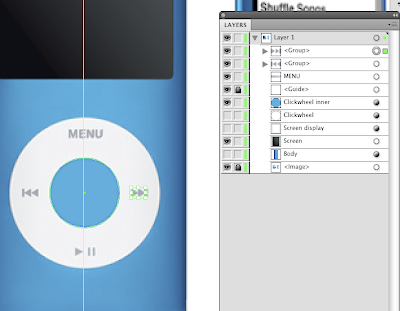


Step 15


Hide the "Body" layer by clicking onto the little eye icon and select the "Clickwheel" layer. Just fill it with white.


Step 16

Hide the "Clickwheel" layer and select the "Clickwheel inner" one. Pick the Eyedropper Tool and choose the actual colour from the source photo.
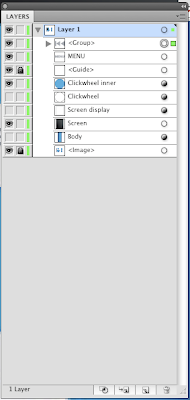
(Note: Rearrange the layer order if needed so that Body is the lower level -above image layer of course-, Clickwheel to be below Clickwheel inner and Screen display below Screen)


Step 17

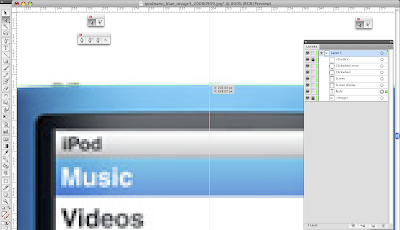
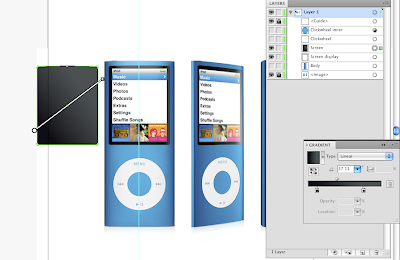
Now we are going to create the shiny black screen border. Select the "Screen" layer and move it to the left by holding Shift key and pressing the left arrow on your keyboard as before.


Step 18

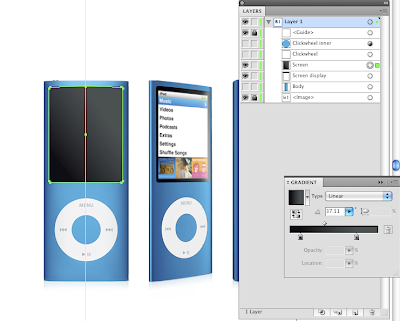
If we notice closely, the black border has a darker tone on the left and bottom part and a lighter one on the right and top. So, we apply a linear gradient with the two tones (which we sample from the picture) and rotate it to match the glossy effect (see my image for details).


Step 19

Move the layer back to its original place by selecting it, holding shift and pressing right arrow on your keyboard until it goes in place.


Step 20

Select the "Screen display" layer and apply a white foreground and a light gray tone. Note that the stroke must be aligned outwards (see detail on my image).
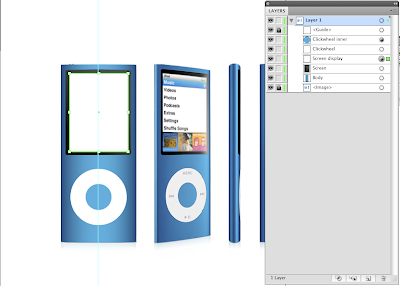


Step 21

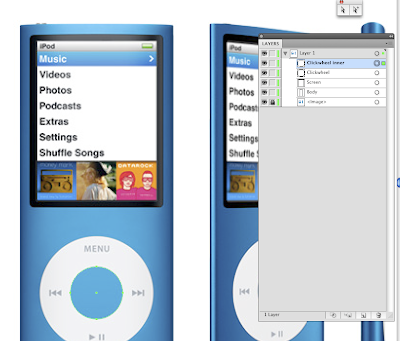
If we enable all layers (turn on the little eye icon on them) we must have something like this...


Step 22

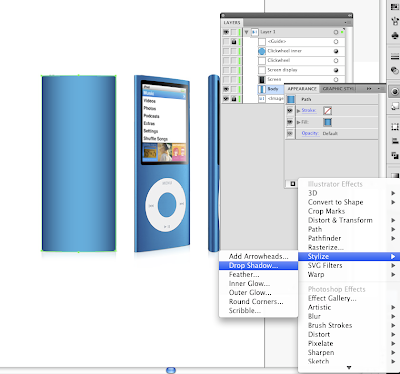
Let's add some shadow to the ipod.
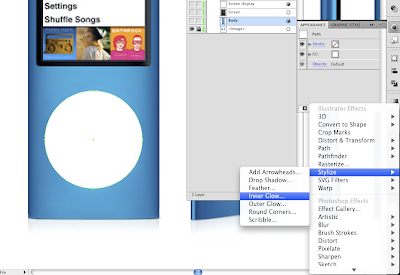
Select "Body" layer and go to Effects-->Illustrator Effects-->Stylize-->Drop Shadow (it can also be accessed through Appearance panel when you click the little "fx" button).


Step 23

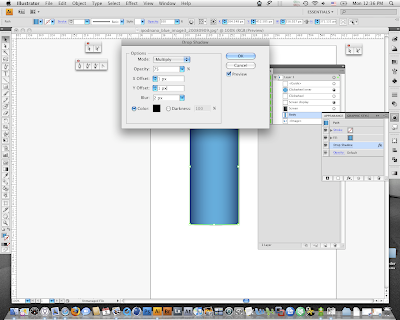
Adjust the shadow to match the desired effect (you can use my settings if you like mine)


Step 24

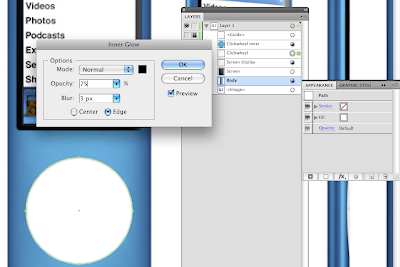
Next thing we are going to make is to add a little depth to the Clickwheel.
Select the layer and go to Effects-->Illustrator Effects-->Stylize-->Inner Glow.


Step 25

Adjust the glow until you have a light gray outline around Clickwheel to add dimension.


Step 26

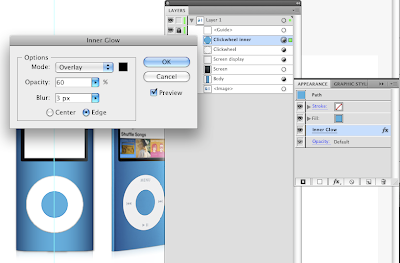
We repeat the same procedure to add an Inner Glow to the "Clickwheel inner" layer.


Step 27

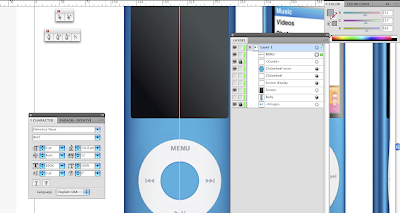
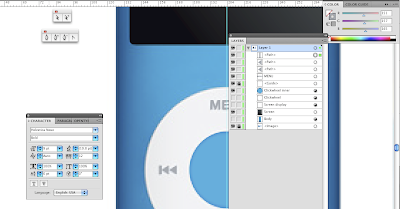
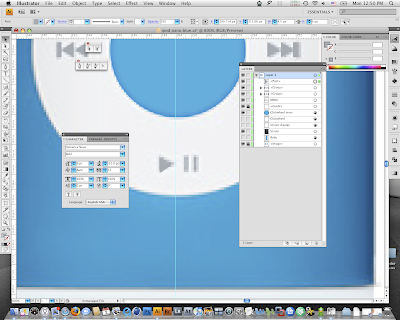
Let's create the "MENU" and arrows printings on the clickwheel now.
Grab the Text Tool (T), choose a similar font (I have chosen "Helvetica Neue Bold") and write the word "MENU". Adjust it through Character pallete to match the actual letters on the photo and pick the light gray tone from the source.


Step 28


Pick the Pen Tool and create the little gray arrow. Press Command+C and then Command+F (Control for PCs) to duplicate and paste it in front. Move the second layer accordingly to match the design. Finally make the little line.


Step 29


Group the three layers (the two arrows and the line) by holding Shift and clicking on the little ball-buttons on the layers palette and then hit Command+G.
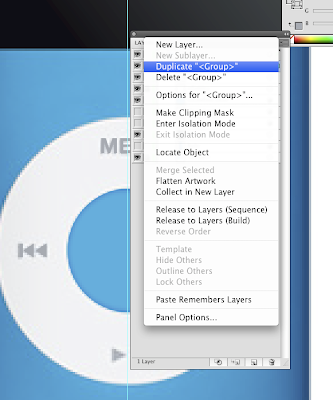


Step 30


Press the little triangle on the rightmost top corner of the layers pallete and Duplicate the group we just made.


Step 31

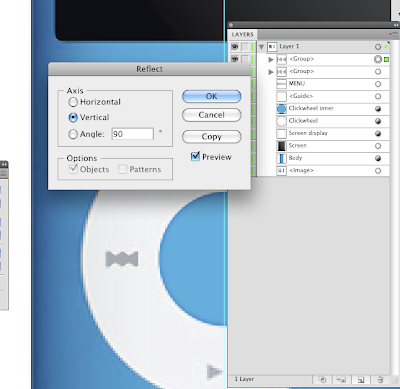
Select the new Group and go to menu Object-->Transform-->Reflect.
Choose "Vertical" and hit OK.


Step 32

Select the duplicated group and move it in place by holding Shift to remain aligned with the left group.


Step 33

By duplicating a right arrow and two lines create the bottom marks. Then group them.
(Note: to duplicate an element just select it from the layers pallete by pressing the little ball-icon and then Command+C & Command+F (Control key on the PCs))


Step 34

So far, if you enable all layers but the image you must have something like...
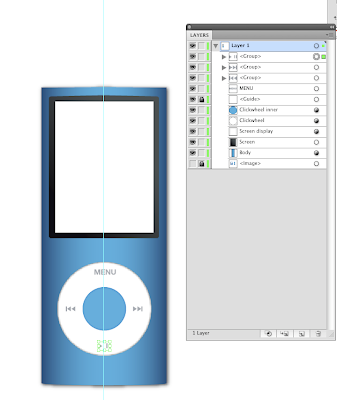


Step 35

We are almost finished!
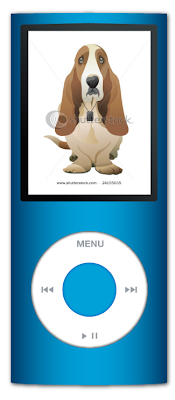
Go to File-->Place and choose an image to display onto our fresh colourful ipod.
[I have chosen one from the vectors in my Shutterstock portfolio, which I really like and all credits go to Katerina [my girlfriend] who made it and upload it to our joint account :)] [End of adverts :P]
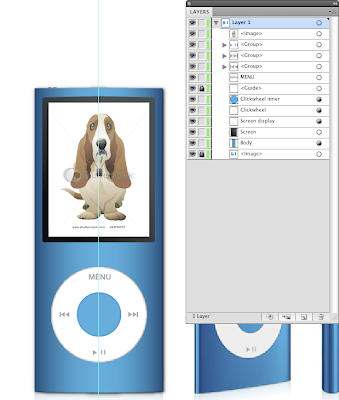


Step 36

Move the display image on top of layers, trash the bottom image layer (source image) and... Voila !

I hope you enjoyed it !

 
Clicky Web Analytics