Saturday, March 7, 2009
Microstock Sites - Earn money by doing your hobby
Tuesday, February 24, 2009
Optimizing Photoshop CS4 on Mac
How to optimize the new Photoshop CS4 and how it differs from CS3 regarding performance
However, a lot of the errors and problems that can occur can be fixed by using the right setting. Many of the problems are not based on CS4 Adobe programming but rather customary user habits that worked well with CS3, but not so well with CS4.
This article is about what you can do to optimize and tweak Photoshop CS4 to get the best settings to maximize performance for the high-resolution digital photographer (full frame or under).
Photoshop CS4 is different from CS3 and I have been getting too many "Out of RAM" errors to ignore this problem. At my department we work with lots of very big files (39 MP+). This requires serious computer power and even with tons of Mac power and lots of memory (RAM), sometimes things just do not move as fast as we hope for.
I just spent a weekend with my team trying to figure out Photoshop CS4 in therms of optimizing for the best possible performance for stock photography and below are the results. When we did these changes to all our computers, the result was mind-blowing. Spread this post around, because it really, really,…will help a lot of people!
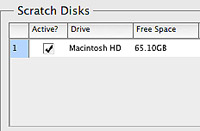 Setting scratch disks
In Photoshop > Preferences > Performance > Set your scratch disk location
The main issues we had with this setting was that sometimes a computer would have less than 2 GB of free storage space available and no one noticed. Photoshop needs at least 2 GB of free hard disk space as scratch disk so make sure you always empty your trash bin and free space regularly. More often than you think you will have too little free space for Photoshop to perform well. We try to have about 10 GB of free space on all our computers at all times.
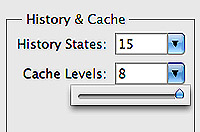 Adjusting your Cache Levels to 8
In Photoshop > Preferences > Performance > Set Cache Level to 8
Low levels are for users with low-res images with lots for layers, high numbers for users with high-res and not too many layers (below 50). For the high resolution digital photographer, a higher setting is better. For full frame shooters or photographers shooting at 16 MP+, a setting of "8" is best. Go to Photoshop > Preferences > Performance > Enter the value 8 in the Cache Levels text box. Click OK.
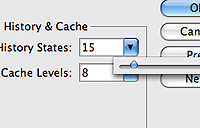 Set the History States to no more then 15 states
In Photoshop > Preferences > Performance > Set History States to 15
When you reduce the number of history states available, you potentially reduce the number of copies of your image filling up your memory (RAM). If you are a high resolution photographer and not a digital artist that “paints” and uses a lot of brushes in Photoshop, there really is no reason for you to have more then 15 history states. Every state is potentially a full resolution copy of your entire image that has to be stored in the cache, so even at 15 history states, this is potentially equal to having 15 images open at once. If you like to move around layers, merge layers, copy layers, liquefy, free transform, paint on masks, copy adjustment layers from one image to another, you are in danger of filling up your cache very fast. Photoshop default is 10 history states, so if you have less then 4 GB of memory, then you should stay at this setting.
 Set the Photoshop memory usage between 85-90 and not 100%
In Photoshop > Preferences > Performance > Select Photoshop Memory Usage to 85%
Counter intuitive, Photoshop needs outside memory (non-Photoshop allocated RAM) to perform some Photoshop tasks such as Free Transform, Liquefy and Content Aware Scaling. If Photoshop is set to memory usage of 100%, you risk getting the famous new CS4 error message “could not perform action… out of memory.” My workstation has 32 GB memory and I still get this message if I set the Photoshop allocation of memory to 100%. When I got CS4 I found this issue so irritating that I at one point moved back to using CS3. It took me quite a long time to figure out that what I had to do was to turn down the amount of memory allocated to Photoshop in order to free more memory. Very counter intuitive
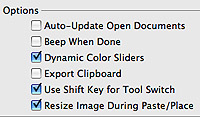 Deselecting Export Clipboard
In Photoshop > Preferences > General > Deselect Export Clipboard
Unless you export a lot of copied files or clips from Photoshop to other applications there is no reason to have this function turned on. Every time you switch away from Photoshop, it stores the clipboard elements as a a PICT file, ready to use for other applications. When switching between applications with Exposé, this function creates the lag that sometimes is experienced in going from Photoshop to other applications.
 Do not have any files on your desktop
According to some Mac experts, having files and folders on your Mac desktop is equivalent to telling the Mac OS to keep these files active in memory at all time. Most people will have stacks of things on their desktop background because of comfort, but they should, according to most experienced Mac users, greatly reduce the performance of your system overall. This is a waste of cache resources, unless you really use the files on the desktop a lot.
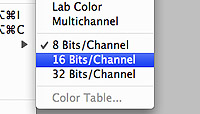 Don’t use 16 bit Tiffs
After almost two years of using 16 bit Tiffs at my department, we set up a test to determine if we where actually able to see a difference in quality. The result was interesting. No one at my department (almost ten people involved in photography), where able to distinguish 16 bit files from 8 bit files. If 16 bit files were directly compared to duplicate 8 bit files, most people where able to see slightly more color details in shadows, but none in the bright areas. If you are a stock photographer, remember that all your files are converted to jpeg, which is at 8 bit anyway.
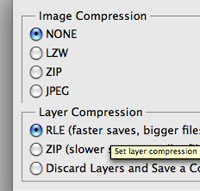 Save files as Tiff uncompressed without compression
Even though I highly recommend saving Tiff files as compressed lossless, only do this as the last step. When editing pictures, whether opening or saving, never use compression. Compressing a file takes up to five to ten times longer, both opening and saving.
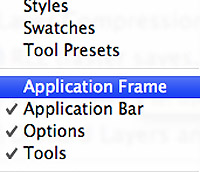 Turn off Application Frame
This feature is supposed to be one of the main reasons why a lot of people are getting the "Out of RAM" error. Turn it off and remember that CS4 handles multiple files differently than CS3 and therefore you cannot have as many open windows with high-resolution files as you could before. This is a little frustrating and I personally hope for an update that will fix this issue.
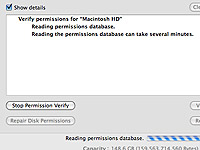 Almost done
Restart Photoshop for the changes to take effect and do a little system optimizing.
Go to Application > Utilities > Disk Utility > Press Verify Disk Permissions and wait.
Go to Application > Utilities > Disk Utility > Press Repair Disk Permissions and wait.
Read this adobe article for more information.


